Some time ago I was visiting my sister’s house and noticed that she had what I would call a statement chair in her living room. The chair was not a match to any of the other furnishings in the room. It stood on its own as a featured piece in the room. I loved how it seemed to be the star of her well-designed room. This is how I recreated that effect in my own home. This L/H is all about how I created a DIY Statement Chair on a budget.
My DIY Statement Chair
This post may contain affiliate links. You can check my disclosure for more info!
I’m one of those people that pull a vision together on the fly. Sometimes I have no idea how a project will turn out until I get all the components. My version of my sister’s statement chair is just such a project. It started out as an idea or a concept that I wanted to recreate, but I didn’t really know how I was going to accomplish it. Keep reading to see how it all came together.
Skin in the Game
I am so fortunate to live in Los Angeles. There is such a wealth of inspiration and resources right in my own backyard. I happen to frequent downtown LA a lot, probably too much. Anyway, on one such trip, I noticed a stylized cow skin at one of my favorite fabric stores. The skin was unique because it seemed to have an intricate almost etched-like design woven into the fabric. Now I know that I paid way too much for this skin. But it was one of those things I just had to have! Sometimes you just got to go for it, you know?
I had no idea what I would use this skin for at that moment. I just knew I loved it. I had never seen anything like it before. So without a vision for a project in mind, I shamelessly added the beautiful skin to my fabric stash.
 Inspiration Hits
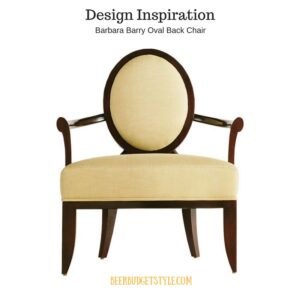
I had almost forgotten about my sister’s statement chair when walking through a Ross store I spotted a chair that reminded me of her beautiful piece. Although it was a little different in shape and lines, it reminded me of an expensive designer piece I had spotted and loved by Barbara Barry in a magazine.
Clearance = In my budget!
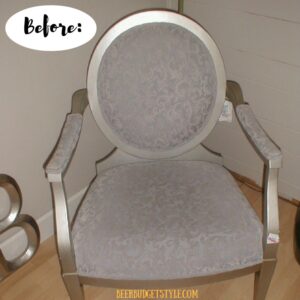
Here’s the best part; it was on clearance! That’s right that magical “C” word! Clearance = In my budget! My chair was marked down to $69.00. Even though it was covered in a dusty blue damask, I could see the potential. So you know what I did right? Of course, I got it! I carefully shoved the chair in my little compact car and headed home. Driving home I hatched my design plan of attack.
 It’s U-G-L-Y
Feeling victorious I carried my soon-to-be designer chair into the house only to be met with my husband’s disapproving look. He said, “where is that going”? I shrugged off his comment and proudly placed the chair in a corner in the living room. I informed my less than visionary better half that it was not an “ugly chair” but rather pre-transformation. I now knew that my “before” chair was to be dressed in that skin I had found weeks before.
TIP: Find a local upholsterer and make them your best friend.
I wish I could say that my DIY skills are at the level where I tackled reupholstering my chair. THEY ARE NOT! But that’s ok! I have a wonderful upholsterer who I love to call on. Mostly because he really appreciates my aesthetic and is always down for whatever I throw at him. Oh and as you will soon see, he does beautiful work.
TaDa!
Before long my chair was back from the upholsterer transformed into a beautiful chair I had desired ever since admiring my sister’s piece. So drum roll, please! Here it is …
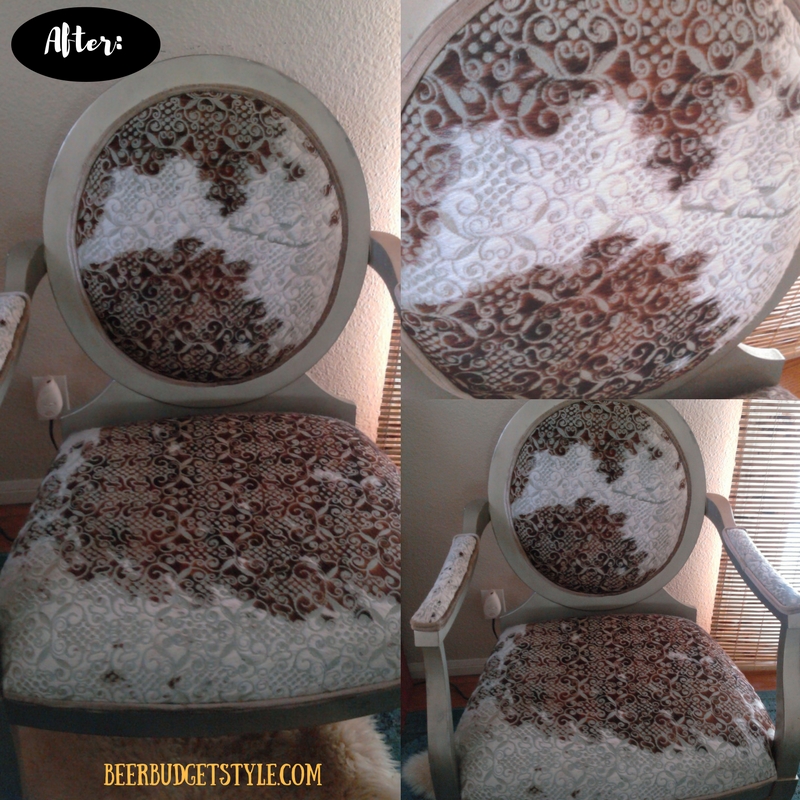
Can you stand it? I L-O-V-E it! I can’t even tell you how satisfying it is to take a piece and transform it into a one-of-a-kind piece that you will love for a long time. Just because you envisioned it!
How To Replicate My DIY Statement Chair
DIY New Year’s Eve glasses

Materials
- Glitter cardstock, metallic cardstock, or heavy cardstock
- StandardGrip cutting mat
- Fine-point blade
- Craft glue or strong adhesive
Tools
- Cricut cutting machine (Explore, Maker, or Joy with adjustments)
- Cricut Design Space SVG for New Year’s Eve glasses
Instructions
Step 1: Upload the New Year’s Eve Glasses SVG to Cricut Design Space
Open Cricut Design Space and upload your New Year’s Eve glasses SVG file. Once it’s on your canvas, you can resize it depending on whether you’re making glasses for kids or adults.
This is where the magic happens — customize the design by:
- Adding a year (hello, instant keepsake!)
- Changing colors for different guests
- Making multiple sizes on one cutting mat
This flexibility is exactly why Cricut DIY projects are my go-to for holiday crafts.
Step 2: Cut Your DIY New Year’s Eve Glasses
Place your chosen cardstock onto a StandardGrip mat and load it into your Cricut machine. Double-check your material settings — cardstock or glitter cardstock — then let your machine do the heavy lifting.
Once the cut is complete, carefully remove the glasses from the mat. Take your time here, especially around the numbers and delicate details. A little patience goes a long way.
Step 3: Assemble the Glasses
Now for the fun part — turning your cut pieces into wearable party accessories.
- If your design includes layered numbers or decorations, glue those on first
- Attach craft sticks or arms to the sides if needed
- Let everything dry completely before wearing (trust me on this one)
At this point, they’ll already be screaming Happy New Year! 🎉
Step 4: Style & Display for Your New Year’s Celebration
These DIY New Year’s Eve glasses aren’t just fun to wear — they double as party decor. Set them out on a table, tuck them into party favor bags, or display them in a jar near the snacks so guests can grab a pair as they arrive.
And yes, people will ask where you bought them. You can casually say, “Oh these? I made them with my Cricut.” 😏
Notes
After I made the glasses for the first time, I created the following video showing just how I did it in Cricut Design Space. In the video, I show you how to weld the pieces of the glasses together so it's a one-piece cut. NOTE: There is no audio to the video, but it is easy to follow.
Designer tip: Glitter cardstock makes everything feel more “New Year’s Eve,” but if you want less mess (and fewer sparkles on your floor until July), metallic cardstock works beautifully too.
Keep Designing –
So what do you think of my chair? Have you transformed a piece of ugly duckling furniture into a beauty? I would love to see it. Please share in a comment below and don’t forget to send pics.
Want to remember this “LOW cost/HIGH style: How To Create A Statement Chair”, to your favorite Pinterest boards or social media channels?