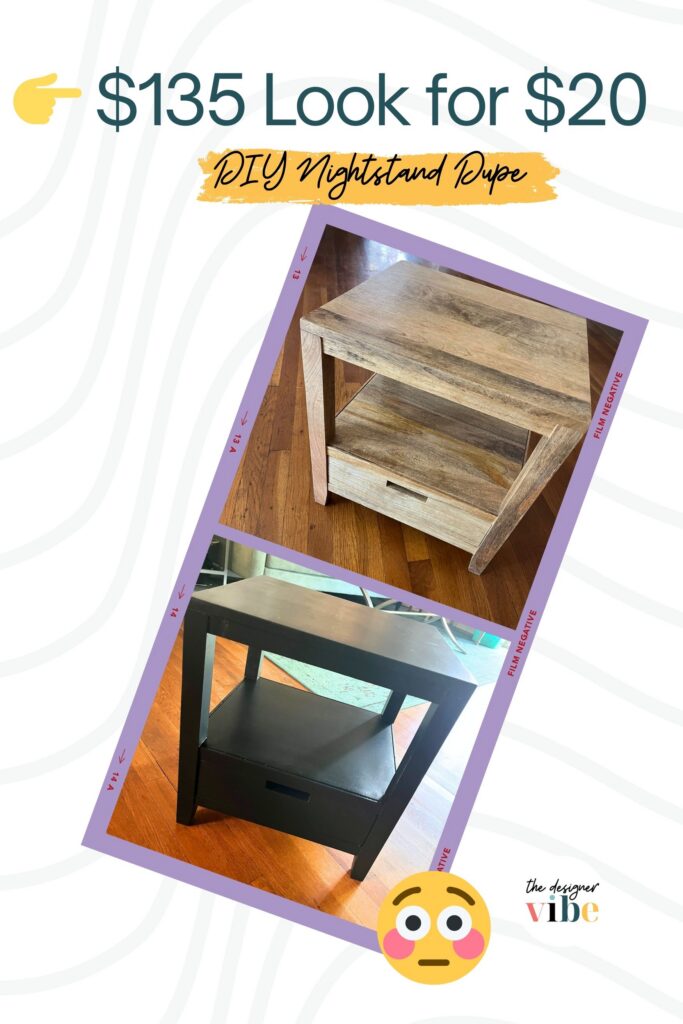
Listen… I like to think of myself as a thrifting/DIY ninja, but even ninjas want a project that’s quick, easy, and actually pays off. And that, my friend, is exactly what this DIY nightstand dupe turned out to be.
What started as a simple search for the “perfect little nightstand” turned into a full-on look for less furniture win—and honestly, one of my favorite budget projects to date.
Let me show you exactly how it all went down.
How I scored a designer-style nightstand for under $20 using second-hand + Dollar Tree finds
The Hunt: From Curbside Score to “Nope, Too Big”
So picture this…
One of my early morning outings (you know, the good thrifting hours), I spotted not one—but TWO nightstands sitting curbside.
#score
Of course, I grabbed them faster than a Dollar Tree candle disappears during fall decor season.
But… plot twist.
They were way too big for the teen room I was working on.
Oh well—you win some, you donate some, right?

The Inspiration Piece (AKA The One That Got Away… Almost)
Back to the search.
I had a vision:
- Something small
- Something interesting
- Something that didn’t cost my entire makeover budget
And then I found it.
A gorgeous, already-painted matte black nightstand on Facebook Marketplace. It had clearly been touched by another DIY angel… but the price?
Let’s just say it was giving “entire room budget” energy 😅
But I loved the look. So instead of buying it, I did what any budget decorator would do…
👉 I decided to recreate it.
Keep Designing –
The Dupe Discovery (This Is Where It Gets Good)
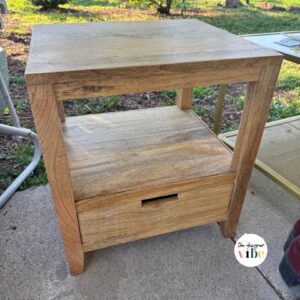
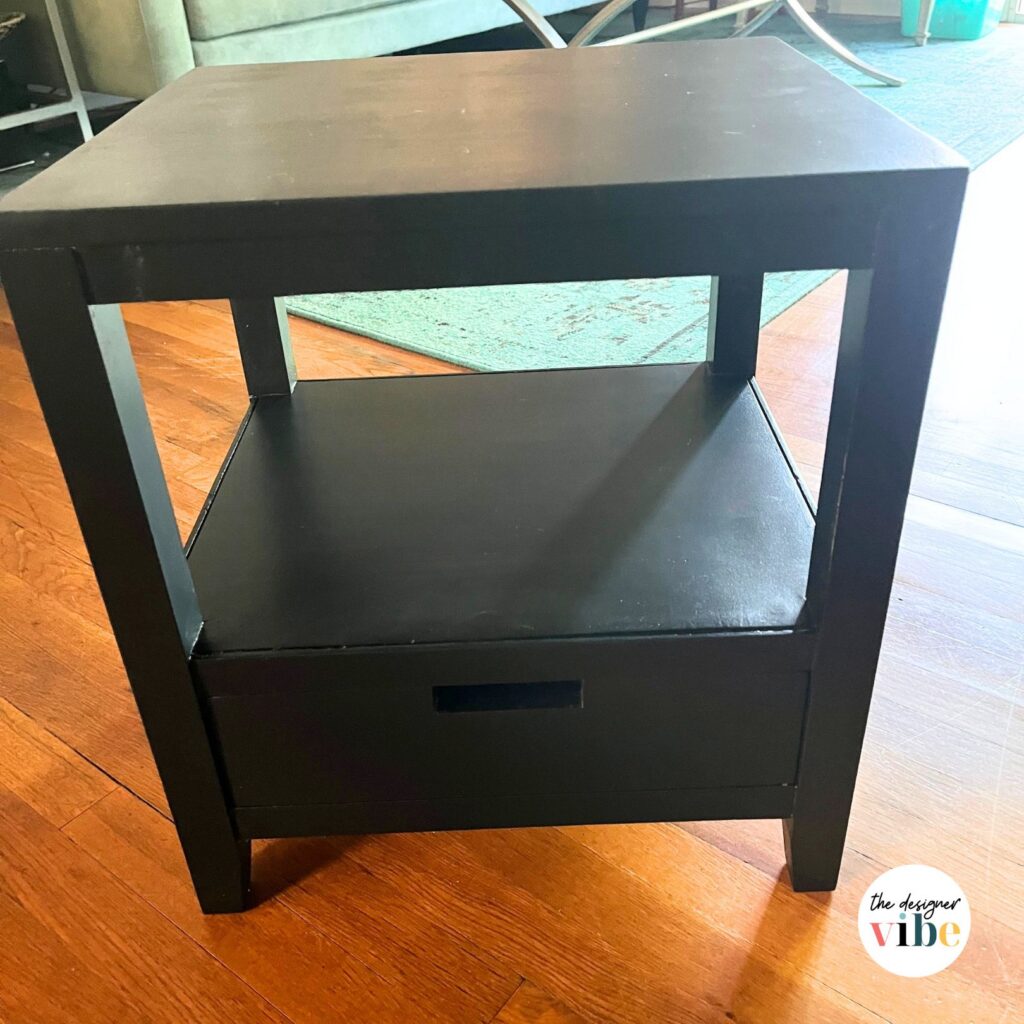
After a couple days of scrolling, I found what looked like the exact same nightstand—just not painted yet.
And the price?
💰 $15
YES. PLEASE.
That’s about $60 less than the other one. This alone had me smiling from ear-to-ear. I mean when I think what I can do with $60. But wait! There’s more.

Quick Research = Big Win
Before grabbing it, I did a little digging (because we’re smart shoppers over here and we already had a semi-fail at the curbside).
I was mainly checking dimensions—but then I discovered something even better:
👉 A set of these nightstands had sold online for $270

Which means my $15 find?
💡 Potentially worth around $135
I love when that happens.
Persistence Pays Off (Because This Was a Journey 😅)
I messaged the seller…
No response.
Messaged again…
Still nothing.
At this point I was determined to make the nightstand mine or go down trying. So I went all in on a notice me campaign:
- Liking his other listings
- Following him on Facebook
- Basically doing the most (no shame)
I almost gave up.
But after what felt like forever (aka 1.5 days), he finally responded:
👉 “Yes, it’s still available.”
AND it was just a short drive away.
Say less.
DIY Nightstand Dupe
Before pickup, I made a quick stop at Michael’s for matte black paint…
…and left empty-handed. #dontbelieveinstock 🙃
But then I remembered:
I had grabbed a few bottles of black outdoor paint from Dollar Tree (because you always grab black and white when you see them—non-negotiable).
Here’s what I used:
Materials
- $15 second-hand nightstand
- 3 bottles of Dollar Tree black paint (2 oz each)
Tools
- Foam brushes (also Dollar Tree)
- 150 grit sandpaper block (you guessed it, Dollar Tree)
- Damp rag
Instructions
1. Clean the Surface
Before anything, I gave the nightstand a good wipe down to remove dirt and grime.
Because paint + dust = not the vibe.
2. Light Sanding
I lightly sanded the entire piece using a 150 grit sandpaper block.
This helps:
- Smooth imperfections
- Prep the surface for better paint adhesion
- If needed, use some wood putty to fill any surface scratches
3. Tack Off Dust
Quick wipe with a damp rag to remove sanding dust.
Don’t skip this—your finish will thank you.
4. Time to Paint
Now for the fun part…
I used my Dollar Tree foam brushes and started painting.
Confession:Sometimes I feel a little guilty painting over wood grain…
BUT—most thrifted pieces (like this one) have imperfections anyway, so paint is basically a rehabilitator.
New life, who dis.
5. Build Up Thin Coats
It took 3 coats total to get that rich, even coverage.
✔ Light sanding between coats✔ Letting each coat dry fully
And here’s the surprise…
Even though the paint was labeled satin, it dried down to a soft matte look—exactly what I wanted.
6. Stretch That Paint (Because We Love a Budget Win)
Each tiny 2 oz bottle gave me a full coat.
Let that sink in.
We really don’t need as much paint as we think we do.
Notes
Total cost for the makeover?
👉 About $4.50 (minus the nightstand)
💡 Pro Tip: Avoid “Paint Skin”
You know when your freshly painted piece sticks to your drop cloth and ruins your finish?
Yeah… I call that paint skin.
Here’s my fix:
👉 Use plastic water bottle caps to elevate your piece while it dries.
Simple. Free. Genius.
Keep Designing –
What I Would Have Done Different
Full Disclosure: Normally, I log a misstep or two on a project. And you might expect that the curbside find would be inserted here. But hear me out, because even though those nightstands were too big for this bedroom project, I am almost certain that I can sell both of them for at least $20. Which BTW would actually pay for this whole project. You gotta love that! So was it a misstep – I think not, lol.
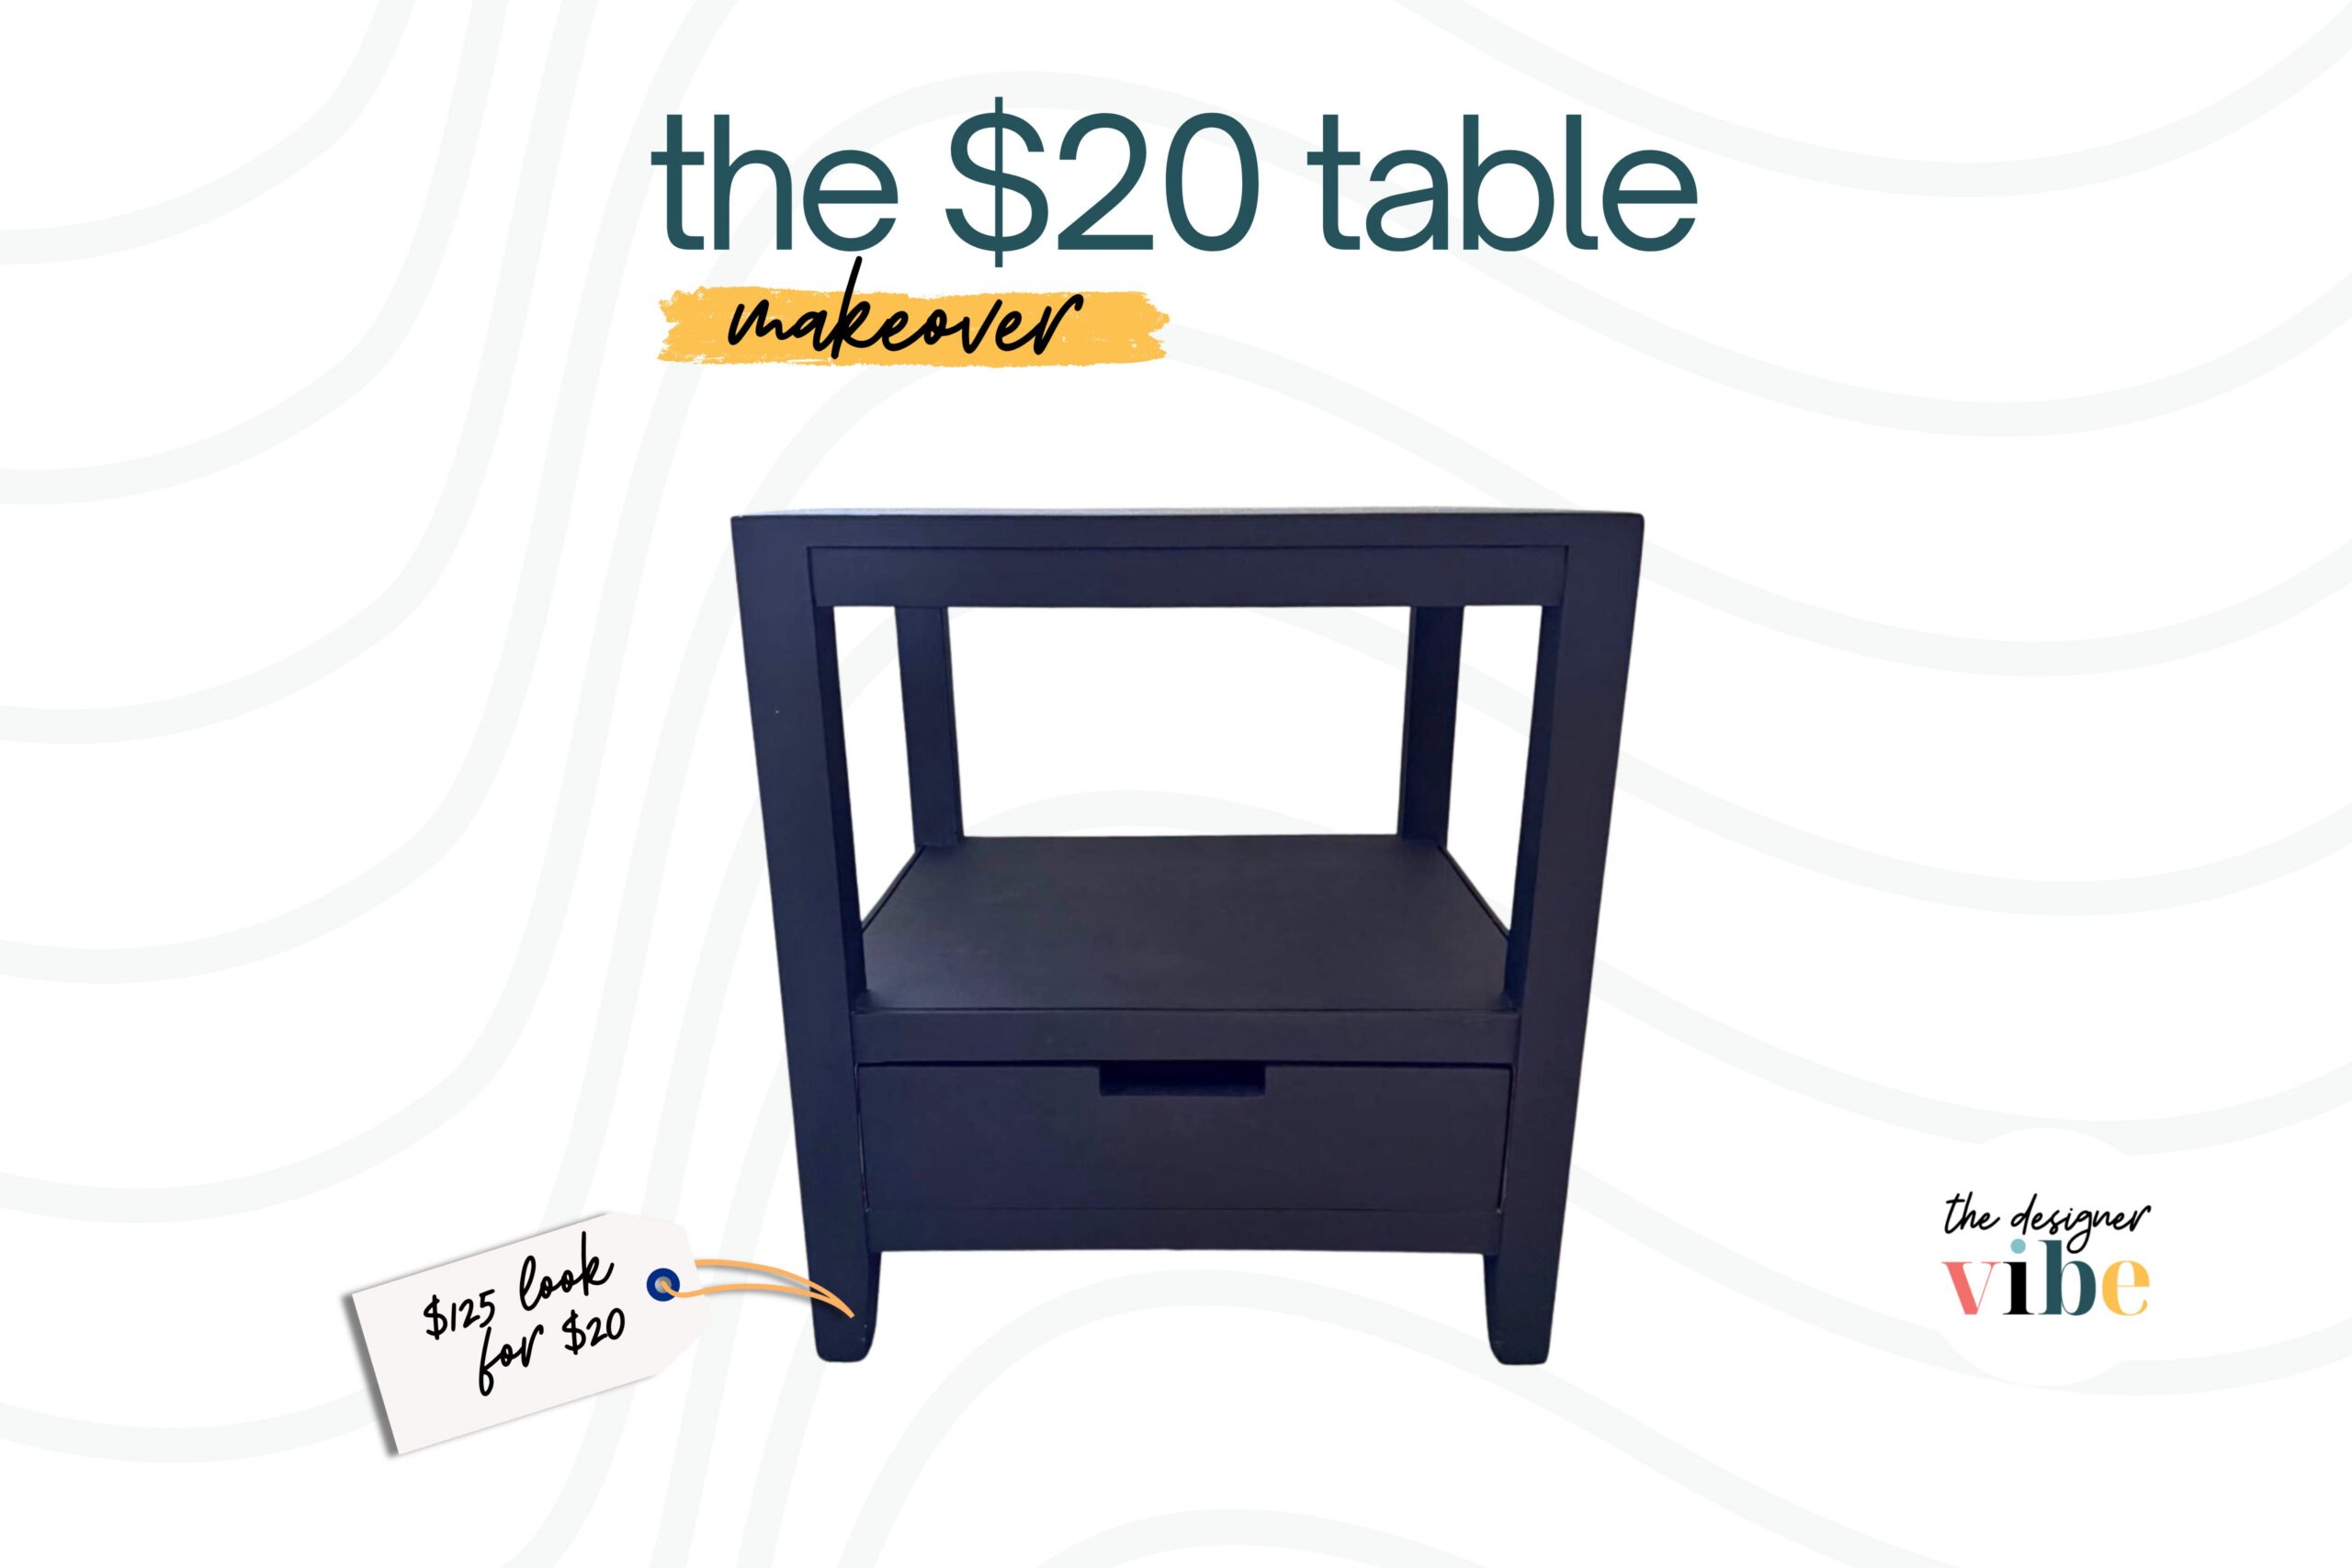
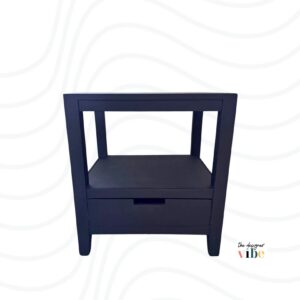
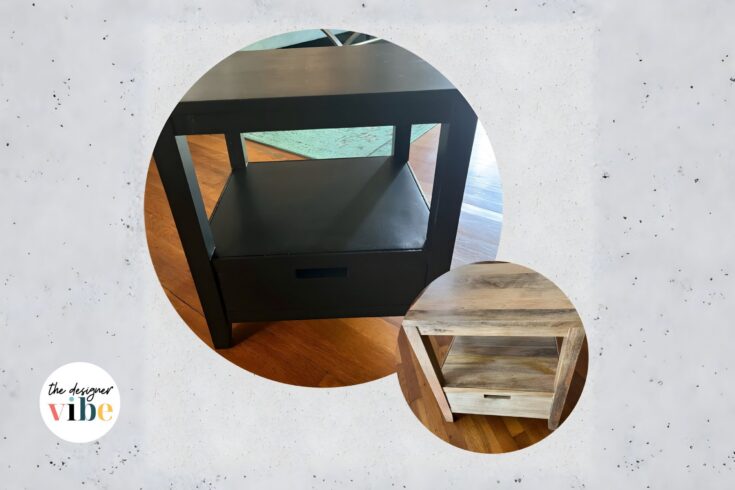
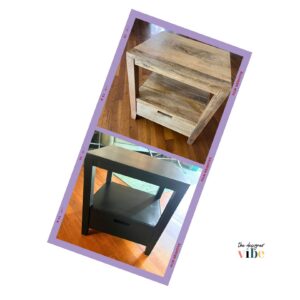
The Final Vibe: A Designer Nightstand for Under $20
Y’all…
I LOVE how this turned out.
The finish reads matte.
The shape feels high-end.
And the whole thing looks like a designer nightstand dupe.
All in:
💰 $15 nightstand
💰 $4.50 paint
👉 Under $20 total
When the original piece? Probably at least 5x that.
And honestly? I’m kind of glad Michael’s didn’t have that paint 😏
Final Thoughts: The Real Secret to a Look-for-Less Nightstand
This project is proof that you don’t need a big budget to get a high-end look.
All it takes is:
- Shopping smart
- Being patient (but persistent 👀)
- And a little DIY confidence
Because at the end of the day?
👉 You can create a designer, one-of-a-kind nightstand for a fraction of the price—and save hundreds of dollars doing it.
And that, my friend, is the whole vibe.