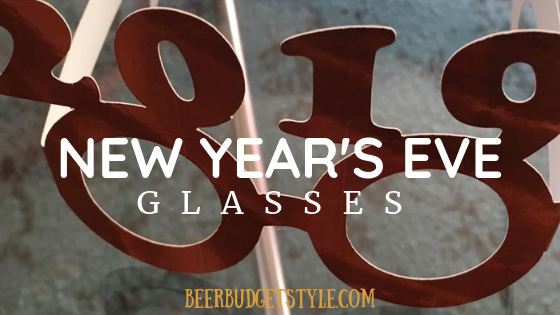
A few years ago, I whipped up a batch of DIY New Year’s Eve glasses using my trusty Cricut for the kids in my childcare program and my grandkids. I figured it would be a fun little craft to keep little hands busy while we waited for midnight… but oh boy, did it blow up! What started as a one-off project turned into an annual tradition because everyone — and I mean everyone — wants their own pair of sparkly, festive glasses for ringing in the New Year. Honestly, some grown adults even fought over who got the gold glitter pair. (I blame the glitter.) Now each year I find myself happily saying, “Yes! Let’s make glasses!” — and it’s become one of my favorite holiday Cricut projects to share.
I posted this project on Facebook. I actually created this New Year’s Eve Glasses project a couple of years ago for my childcare kids. It was so much fun and SO EASY that I kinda make it a point of making them every year now. Since posting it, I have received so many questions on how to create the glasses that I thought I would write a quick post to show just how easy it is to create these fun New Year’s Eve Glasses.
Why I created the New Year’s Eve Glasses
My daytime job used to be a childcare provider and a few years ago, just before the New Year’s break, I wanted to create something for the kids. I thought it would be fun to make the kids New Year’s Eve Glasses. I had an idea about how I wanted them to look and I knew with my Cricut die cutting machine I could get them done in quick order.
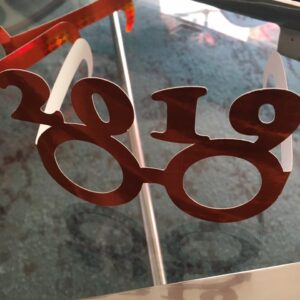
I was so happy with my New Year’s Eve Glasses and really amazed at how easy they were to make. I mean SUPER EASY! This was awesome because it was one of the first projects I made on the Cricut using the “weld” feature. I love learning new things that the Cricut does!
Anyway, if you would like to create the glasses too, keep reading.
DIY New Year’s Eve Glasses
If you’re ready to make your own DIY New Year’s Eve glasses with a Cricut, this tutorial breaks it down step-by-step so even if you’re a Cricut newbie, you’ll be crafting like a pro. Whether you’re crafting for a party, kiddo celebration, or just want a playful way to welcome January 1, these custom party glasses are a must-make project. From choosing the right Cricut Design Space SVG to cutting and assembling your frames, I’ve got all the tips and tricks you’ll need to make your New Year’s Eve sparkle.
Why DIY New Year’s Eve Glasses Are Always a Hit
There’s just something about novelty glasses that instantly puts people in a celebratory mood. These DIY New Year’s Eve glasses are festive, customizable, and way more fun than anything you’ll grab off a store shelf last minute. Plus, when you make them yourself, you can tailor them to any age group — sparkly for adults, bold and playful for kids, or somewhere in between.
Best of all? This project is quick, budget-friendly, and totally beginner-approved, making it the perfect Cricut tutorial for a holiday craft binge.
How to Make the Glasses
Measure
Most of the questions I got about the New Year’s Eve Glasses are “what size should the pieces be?” Since I was creating the glasses for very young children, my measurements may or may not work for your purposes.
The best thing to do, and what I did, is to measure the person who will be wearing the classes. I measured two or three of the children’s faces and realized which measurements would probably be a universal fit.
Here’s how to measure –
Make sure the frames end-to-end measure the size of the person’s face from temple to temple. The sides of the glasses should equal the measurement from the front of the face to behind the ear. Add 1/2 inch to both measurements for comfort and better fit.
What you will need
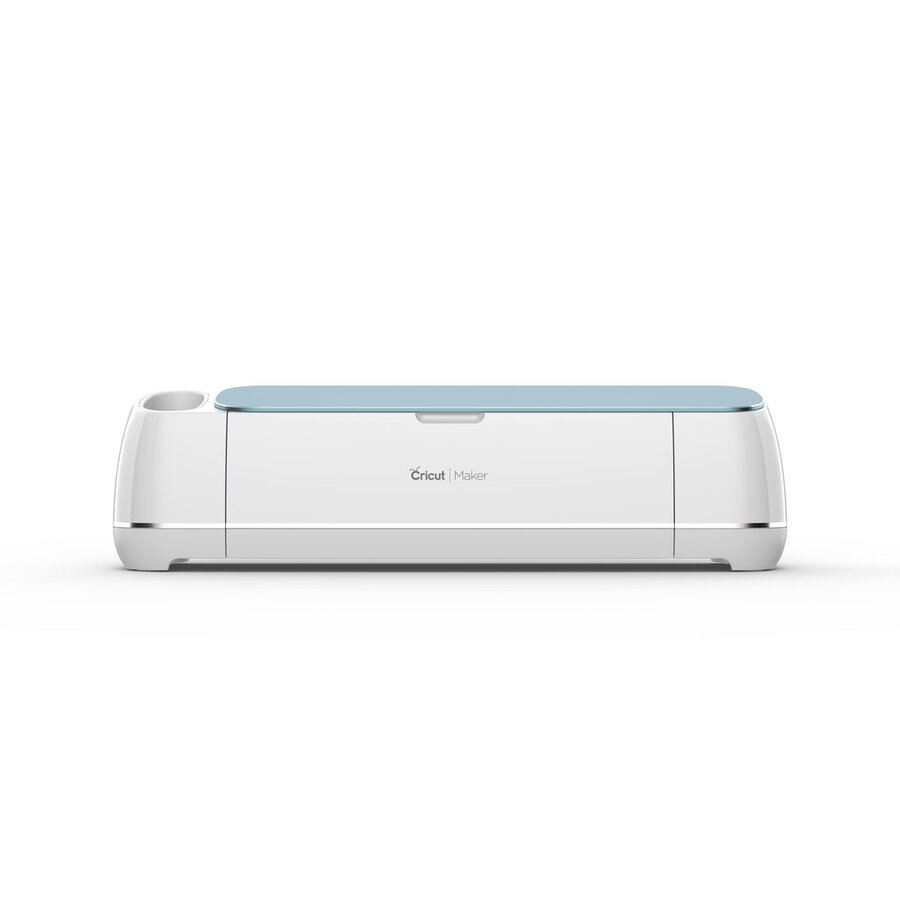
- Cricut Die-Cutting Machine – Explore, Explore-Air or Maker
- Poster board, metallic or plain (at least 11″ x 14″, 20″ x 30″ would be best)
- Get this FREE SVG file
CLICK HERE for SVG file in Cricut Design Space.
Here’s how to create these SUPER EASY New Year’s Eve Glasses and bring in the New Year in fun fashion.
DIY New Year’s Eve glasses
Materials
- Glitter cardstock, metallic cardstock, or heavy cardstock
- StandardGrip cutting mat
- Fine-point blade
- Craft glue or strong adhesive
Tools
- Cricut cutting machine (Explore, Maker, or Joy with adjustments)
- Cricut Design Space SVG for New Year’s Eve glasses
Instructions
Step 1: Upload the New Year’s Eve Glasses SVG to Cricut Design Space
Open Cricut Design Space and upload your New Year’s Eve glasses SVG file. Once it’s on your canvas, you can resize it depending on whether you’re making glasses for kids or adults.
This is where the magic happens — customize the design by:
- Adding a year (hello, instant keepsake!)
- Changing colors for different guests
- Making multiple sizes on one cutting mat
This flexibility is exactly why Cricut DIY projects are my go-to for holiday crafts.
Step 2: Cut Your DIY New Year’s Eve Glasses
Place your chosen cardstock onto a StandardGrip mat and load it into your Cricut machine. Double-check your material settings — cardstock or glitter cardstock — then let your machine do the heavy lifting.
Once the cut is complete, carefully remove the glasses from the mat. Take your time here, especially around the numbers and delicate details. A little patience goes a long way.
Step 3: Assemble the Glasses
Now for the fun part — turning your cut pieces into wearable party accessories.
- If your design includes layered numbers or decorations, glue those on first
- Attach craft sticks or arms to the sides if needed
- Let everything dry completely before wearing (trust me on this one)
At this point, they’ll already be screaming Happy New Year! 🎉
Step 4: Style & Display for Your New Year’s Celebration
These DIY New Year’s Eve glasses aren’t just fun to wear — they double as party decor. Set them out on a table, tuck them into party favor bags, or display them in a jar near the snacks so guests can grab a pair as they arrive.
And yes, people will ask where you bought them. You can casually say, “Oh these? I made them with my Cricut.” 😏
Notes
After I made the glasses for the first time, I created the following video showing just how I did it in Cricut Design Space. In the video, I show you how to weld the pieces of the glasses together so it's a one-piece cut. NOTE: There is no audio to the video, but it is easy to follow.
Designer tip: Glitter cardstock makes everything feel more “New Year’s Eve,” but if you want less mess (and fewer sparkles on your floor until July), metallic cardstock works beautifully too.
TIP: After creating the glasses, it might be a good idea to cut out a sample to check the fit before making the final cuts to the posterboard.
Project Tips
Oh, by the way, be sure to get your poster board that’s at least 11″ x 14″ (20″ x 30″ even better). Common 12″ x 12″ cardstock paper probably won’t work. The overall length of the glasses will most likely be over 12″ even for a child-size.
I like using metallic poster board for this project. But you could pick up plain white or black poster board at the Dollar Tree and easily use that instead.
Variations
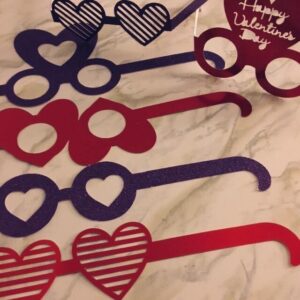
And while I created these as New Year’s Eve Glasses for the kids, it would be super easy to size them for adults. Just follow the same measuring instructions above to create a larger size of the glasses.
These glasses look great in just about any color of the metallic posterboard, but if you only have plain white posterboard use that. They will still look great!
The glasses would be perfect for a New Year’s Eve party favor too. Imagine the great pictures you’ll get!
Even though this project is for New Year’s Eve Glasses you could easily change the design. You could make the glasses for Valentine’s, St. Patrick’s Day, 4th of July, birthday parties, etc. Just like most projects I make with my Cricut, the sky’s the limit. Just be sure to save the eyeglass SVG template for future use.
Related Reading: CRICUT EXPLORE MACHINE: Basic Starter Kit for Cricut
[raw_html_snippet id=”michaels coupon – banner”]
Why This Cricut Tutorial Is Worth Saving
And that’s it! I told you it was super easy. Don’t you just love it when a project is SUPER SIMPLE like this but still has amazing results?!
This is one of those Cricut tutorials you’ll come back to year after year. Change the numbers, swap the colors, and suddenly you’ve got a brand-new project without starting from scratch.
Whether you’re crafting for kids, grandkids, or a room full of adults who still love a little sparkle, these glasses prove that simple DIYs can still bring big smiles.
Seriously, I think this project is so simple even a 1st time user of the Cricut could do it with ease.
CLICK HERE for SVG file in Cricut Design Space.
Oh, by the way, be sure to get your poster board that’s at least 11″ x 14″ (20″ x 30″ even better). Common 12″ x 12″ cardstock paper probably won’t work. The overall length of the glasses will most likely be over 12″ even for a child-size.
I like using metallic poster board for this project. But you could pick up plain white or black poster board at the Dollar Tree and easily use that instead.