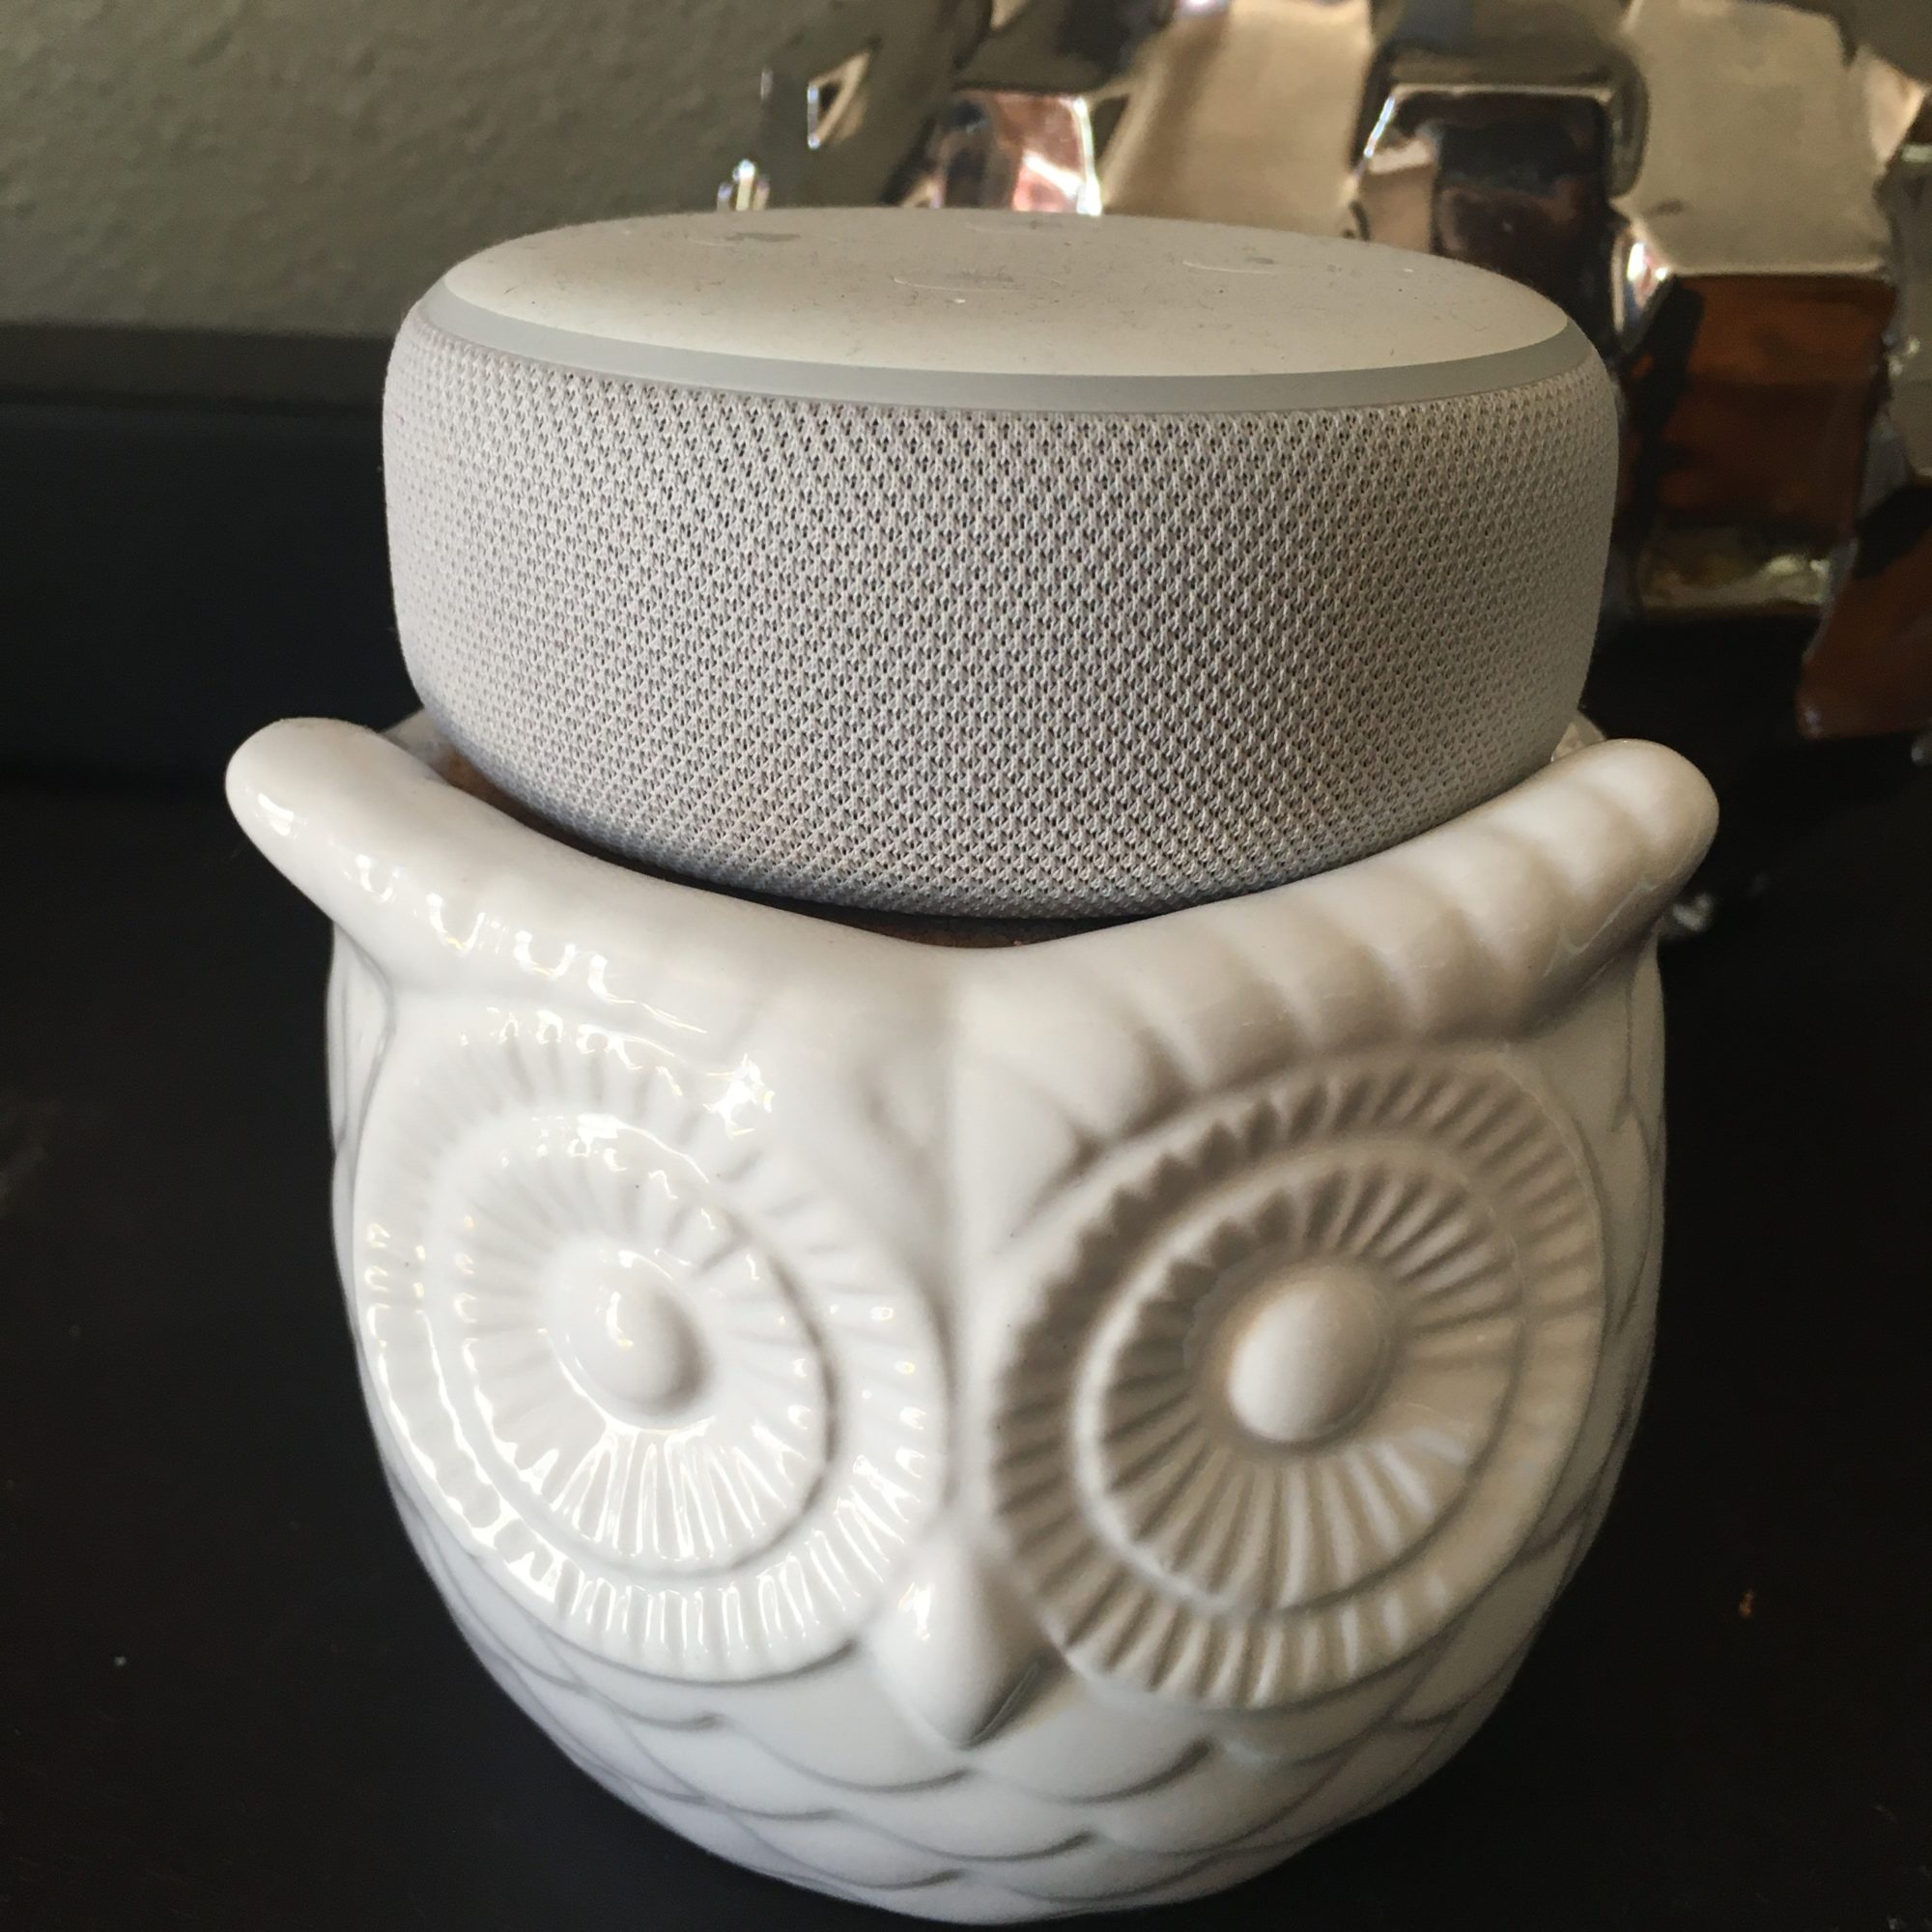
Let me show you how I created a DIY Echo Dot Holder from some dollar store finds in minutes for only $3.00. You are going to love this!
So I have to admit, I love a quick & cheap project. Here’s the thing, it can’t look cheap. If ya know what I mean.
Such as it was with this project. I can’t wait to show you how it came out.
DIY Echo Dot Holder
Because It’s So Cute!
Because I love just about everything to look pretty, after I got our first Echo Dot I decided it needed a proper throne. So of course I checked Amazon for something cute. I found this adorable owl Echo Dot holder.

I know! It’s cute which is why I was this close to adding it to cart, but then I thought “$25, REALLY? Do I really need to spend $25 on that?” The answer must have been no because I never ordered it.
My $3 DIY Echo Dot Holder
I had almost forgotten all about the holder when one day I was strolling down the eisles of my .99$ Store and I stumbled upon this cute planter.
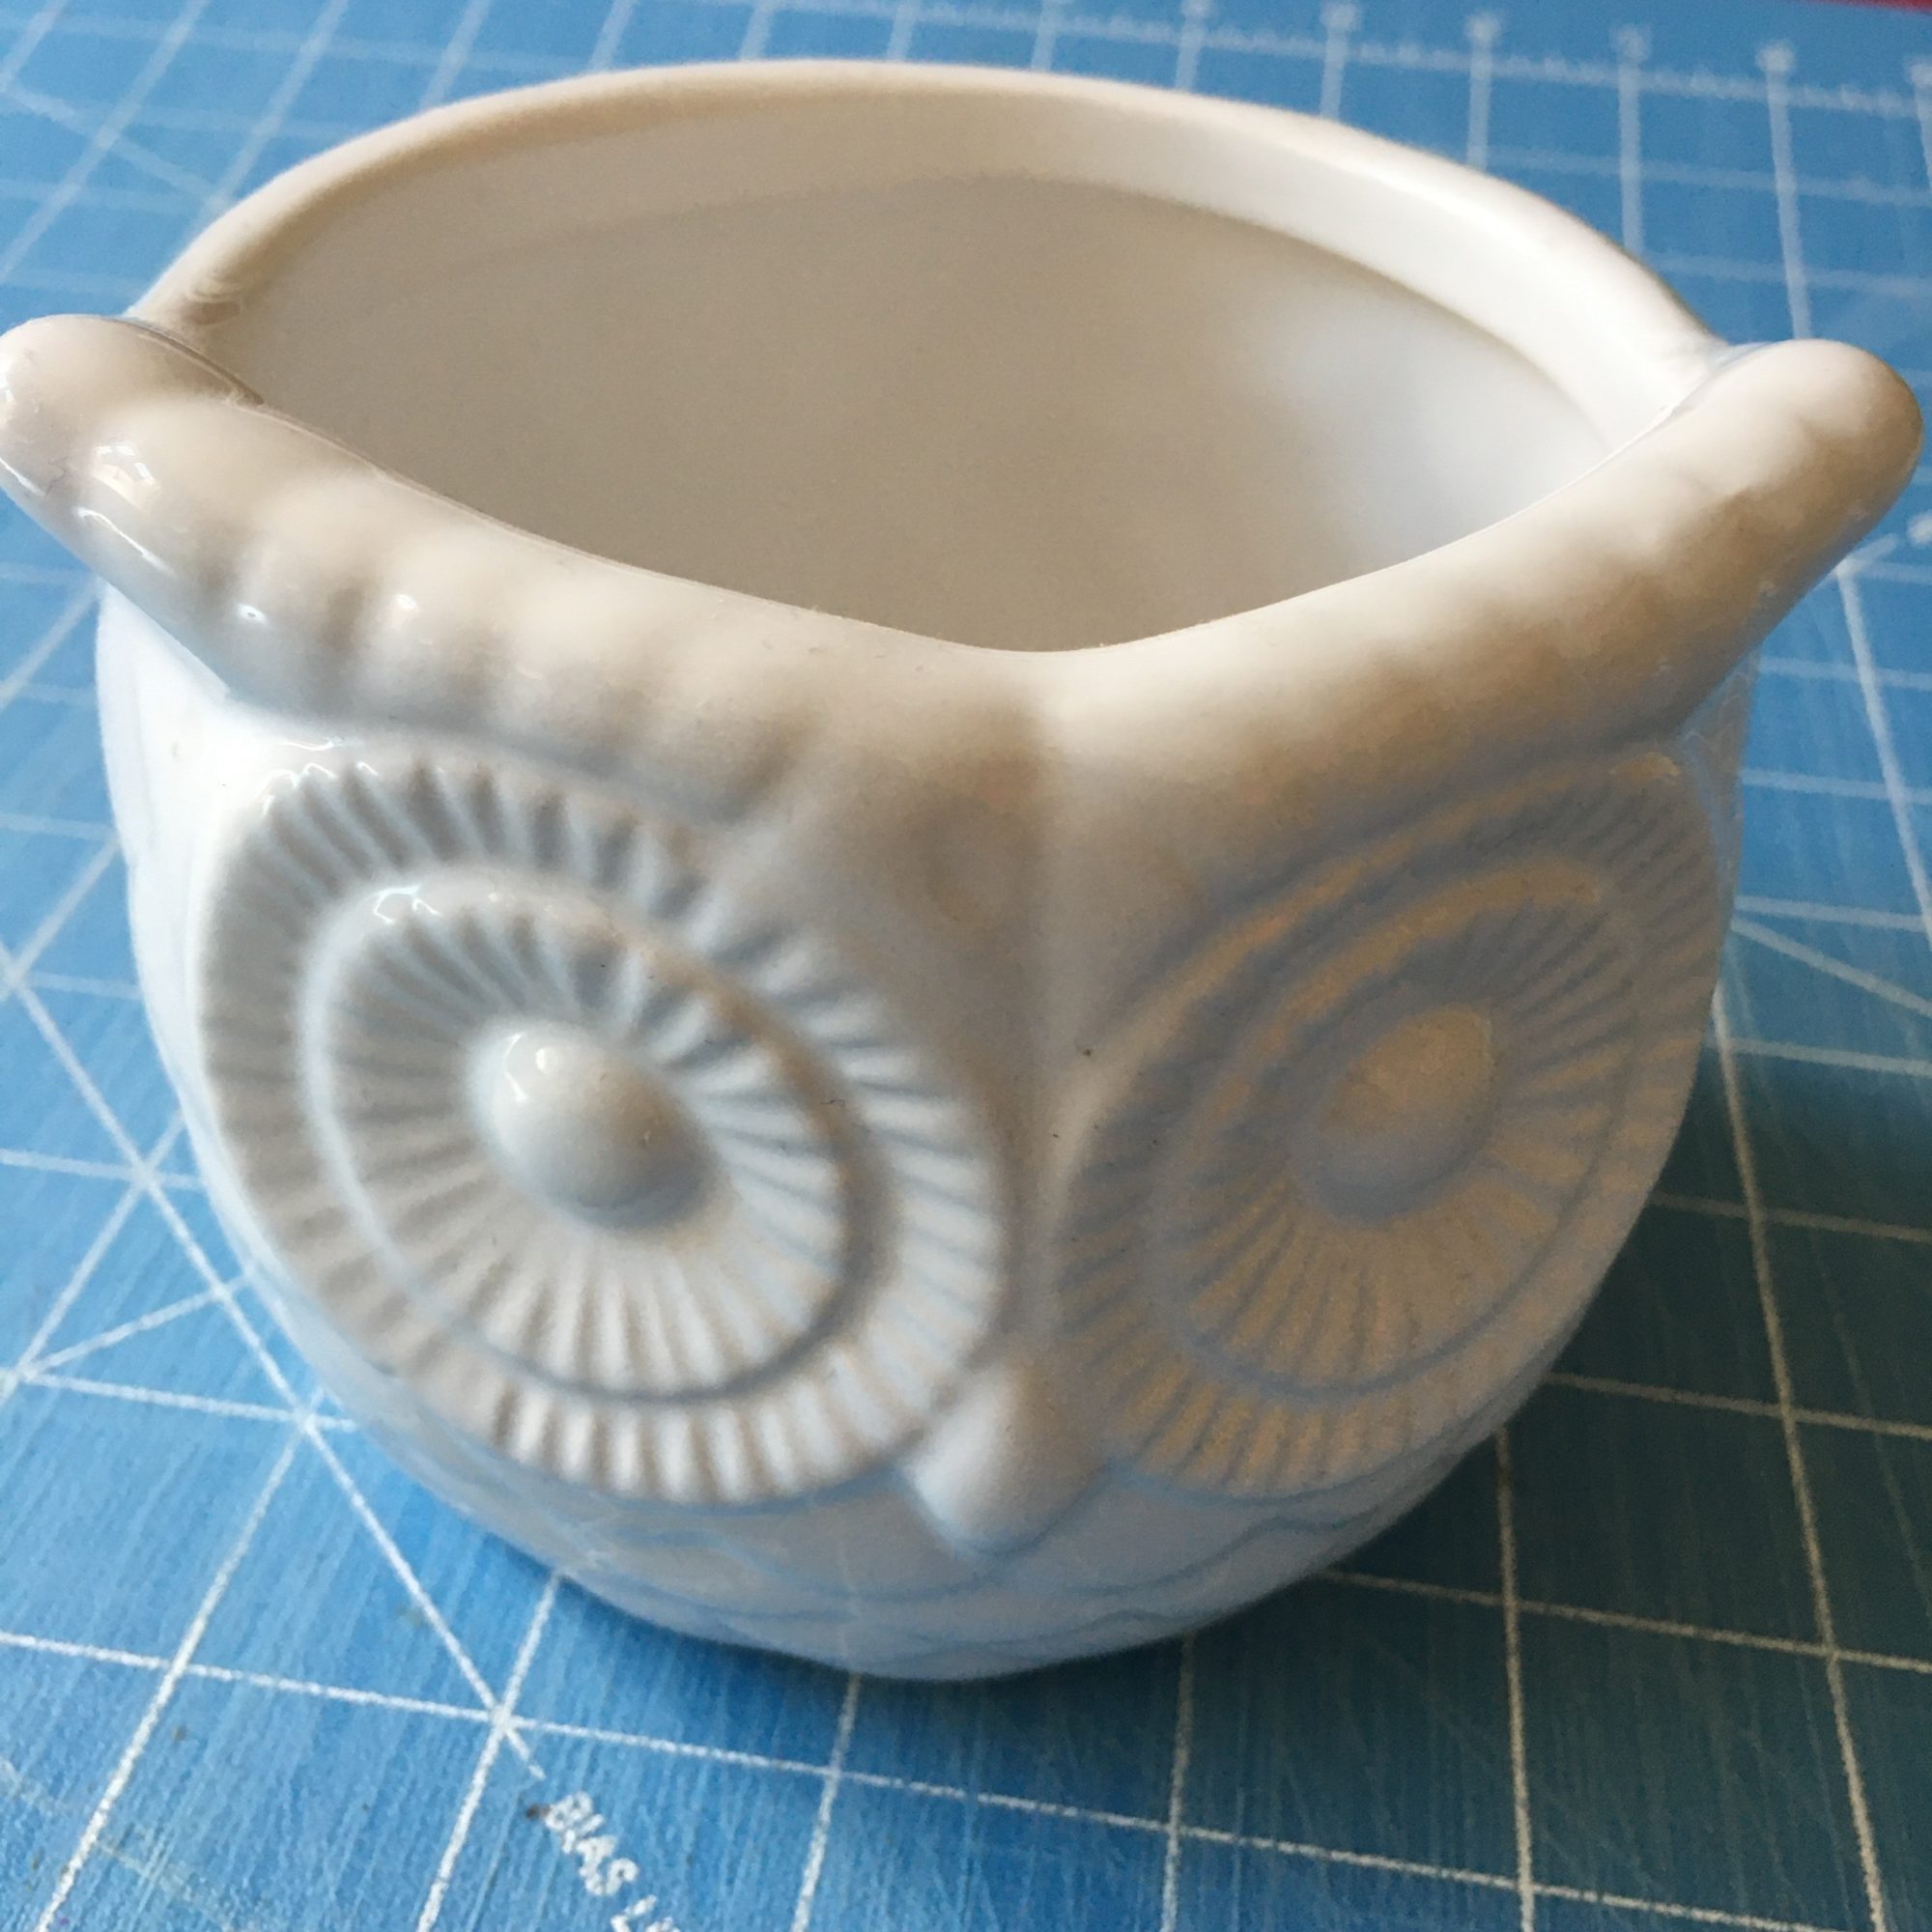
You already know what I was thinking right? I think because it looked so much like the holder I had seen on Amazon, I immediately thought “I’ll make my own DIY Echo Dot holder.”
I actually picked up three of the planters. Because why not? They were only $1.50. I knew my daughter might want a holder and I could probably find someone else who wanted the cute holder I was about to make.
DIY Echo Dot Holder
DIY PINK STARBURST CHRISTMAS TREE TOPPER (Dollar Tree Version Inspired by Glinda’s Wand)

Bring a little Wicked-inspired magic to your Christmas tree with this budget-friendly DIY starburst tree topper made entirely from Dollar Tree finds. Using inexpensive icicle ornaments, a simple foam ball, and a sprinkle of pink glitter, you can recreate the sparkle and charm of Glinda’s iconic wand—perfect for a whimsical, glam, or movie-themed holiday tree. This easy craft comes together in under an hour, costs just a few dollars, and creates a stunning statement piece that looks like it came straight from a fairytale (not the dollar aisle!).
Materials
- All from Dollar Tree unless noted:
- 2 small packs of icicle Christmas ornaments
- 1 foam ball (any small styrofoam ball works)
- Pink glitter (I used a sparkly fine glitter)
- Pink glitter glue (for adhesive + shimmer)
- Optional: extra icicle pieces from other projects
Tools
- Hot glue gun + glue sticks
- Small paintbrush
Instructions
Step 1: Prep Your Icicles
Budget Friendly Creations cuts her icicles so they’re even—so I followed suit.
- Take each icicle ornament and snip it in half.
- Try to cut them roughly at the same “groove” so your starburst looks balanced.
These will become the "spokes" of your starburst topper.
Step 2: Cover Your Foam Ball in Pink Glitter
This is where my Glinda twist comes in.
- Squeeze pink glitter glue all over the foam ball.
- Spread it evenly with a small brush.
- While it’s still wet, sprinkle pink glitter liberally over the surface.
You basically want it to look like Glinda whispered a spell over it.
Let it dry completely before adding the icicles.
Step 3: Add the Icicles (AKA the Starburst!)
This part is shockingly satisfying.
- Use your hot glue gun to poke a tiny hole where each icicle will go.
- Add a dot of hot glue into the hole.
- Insert one icicle half into the foam ball.
Attach one icicle, then attach one directly opposite it—this keeps the starburst symmetrical.
Repeat until you’ve filled the shape evenly all the way around.
For extra fullness:
If you have leftover icicle tips or pieces from other Dollar Tree crafts, add those too.
Step 4: Add More Sparkle (Because You Know Glinda Would)
If any bits of foam peek through:
- Add more glitter glue
- Sprinkle more pink glitter
- Tap off the excess
You ultimately want a shimmery pink core with crystal-like icicles bursting from every angle.
Step 5: Attach to Your Tree
There are a few easy ways to attach it:
- Push a stick/skewer/dowel into the bottom and secure it in your tree
—OR— - Simply nestle it into the top branches (it’s lightweight!)
And voila… your Glinda-approved starburst topper is ready for its debut.
Notes
Feel free to customize the glitter color to match your Christmas theme! I used pink to capture that Glinda-inspired sparkle, but you can use any shade you love—gold for classic glam, red or green for traditional holiday vibes, or even silver or iridescent glitter if you want the foam ball to virtually disappear and let the icicles take center stage. It’s completely customizable and always magical.
This project is hands down one of my favorites! Not just because it was only $3, but because it was so darn fast, easy, & fabulous!
Keep Designing –
This One Was Even Easier!
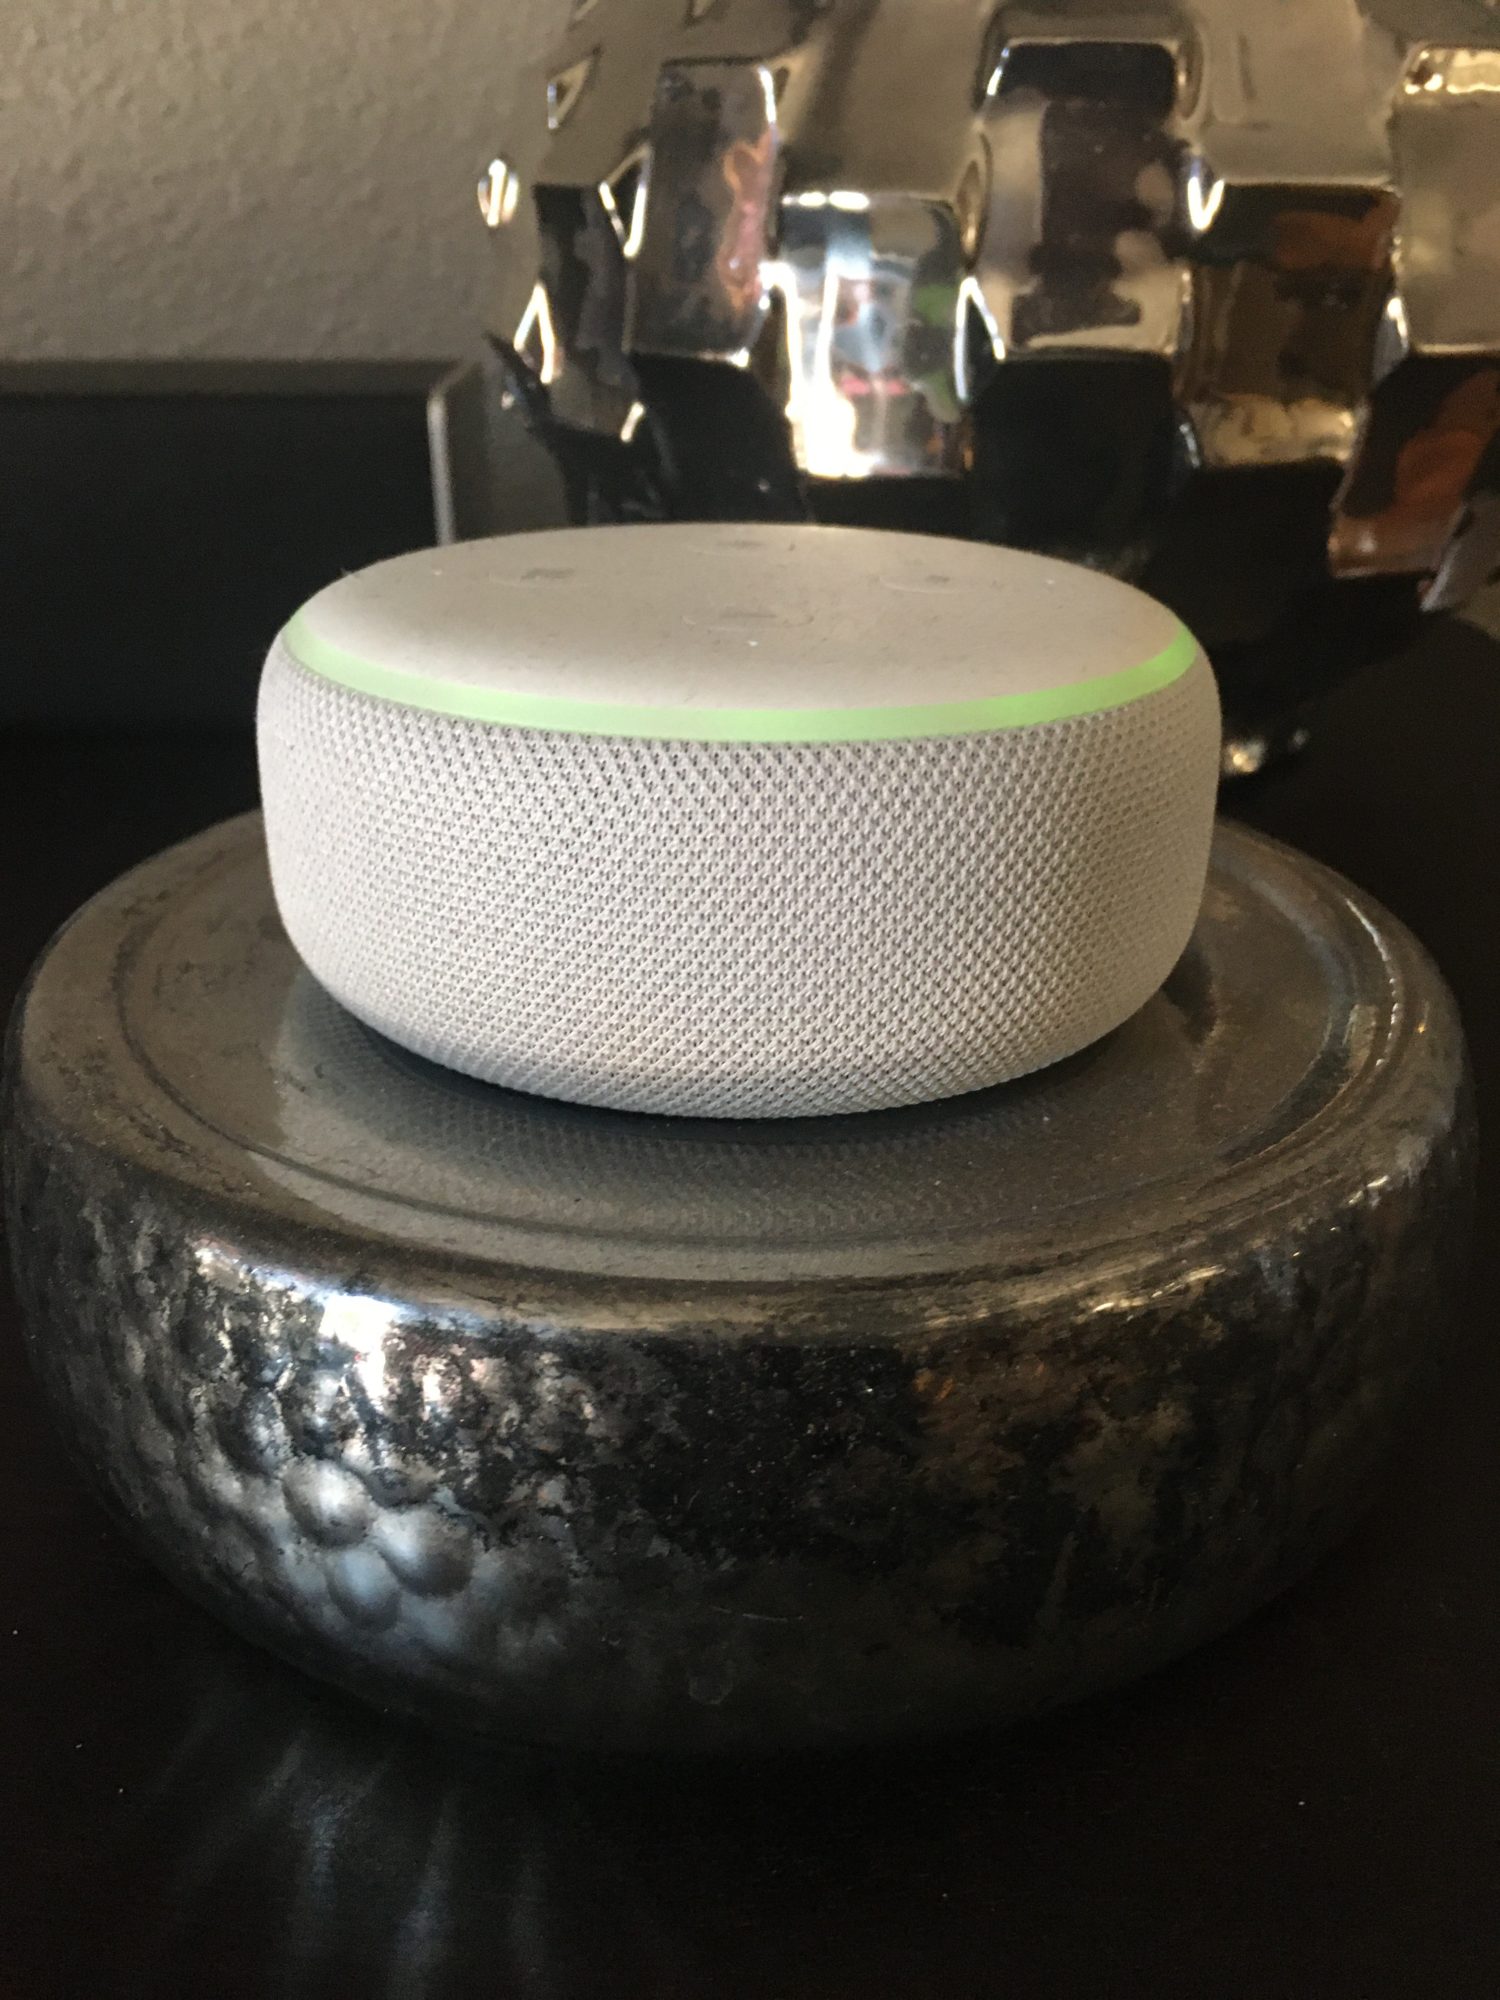
We actually have 3 echo dots now. Here’s the holder I created for the one in the living room. I say created, but actually I found this cute metallic, ceramic holder at the Goodwill. I think it’s actually a candle holder, but not anymore. LOL