Like most things nowadays, I think I saw this wreath on Pinterest. It’s a lovely linen wreath by West-Elm. I really like the neutral tone of the wreath mixed with a little bling. Anyway, I wanted it and even better I figured I could recreate it pretty easily. So that’s just what I did. Check out how I duped this lovely West-Elm Wreath.
This post may contain affiliate links. You can check my disclosure for more info!
I said this would be easy to recreate and it is, but especially if you have a die-cutting machine. My choice is my Cricut Explore. But even if you don’t own a die-cutting machine, you can still make this project inspired by the West-Elm Wreath. Keep reading for those instructions. Ok, let’s get to it!
[raw_html_snippet id=”cricut air – make every minute count”]
West-Elm Wreath Dupe
The Ingredients
- Cricut Explore Machine
- Scrapbook paper (Linen textured)
- Chipboard
- White glue
- Glue Gun & Glue sticks (optional)
- Metallic buttons
- Chopstick or Pencil
- 3M Removable Velcro hanger
NOTE: I used a scrapbook paper that was Ecru color because I wanted to get as close to the look of the original wreath. You can choose whatever color you desire to make your wreath.
[raw_html_snippet id="michaels coupon - square"] |
The Bones
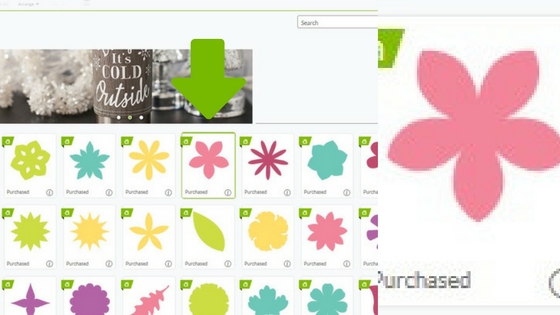
If you have a Cricut you probably use Cricut Design Space all the time. I knew I had seen this image because I purchased the Mother’s Day Bouquet cartridge when I had my previous Cricut machine. But whether you own it or not you can purchase this image on Cricut Design Space.
Petal Clusters
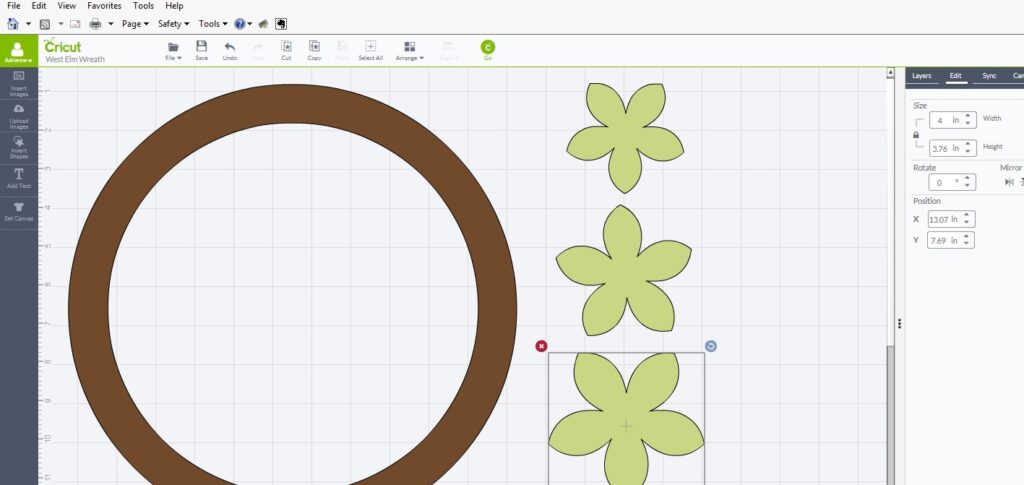
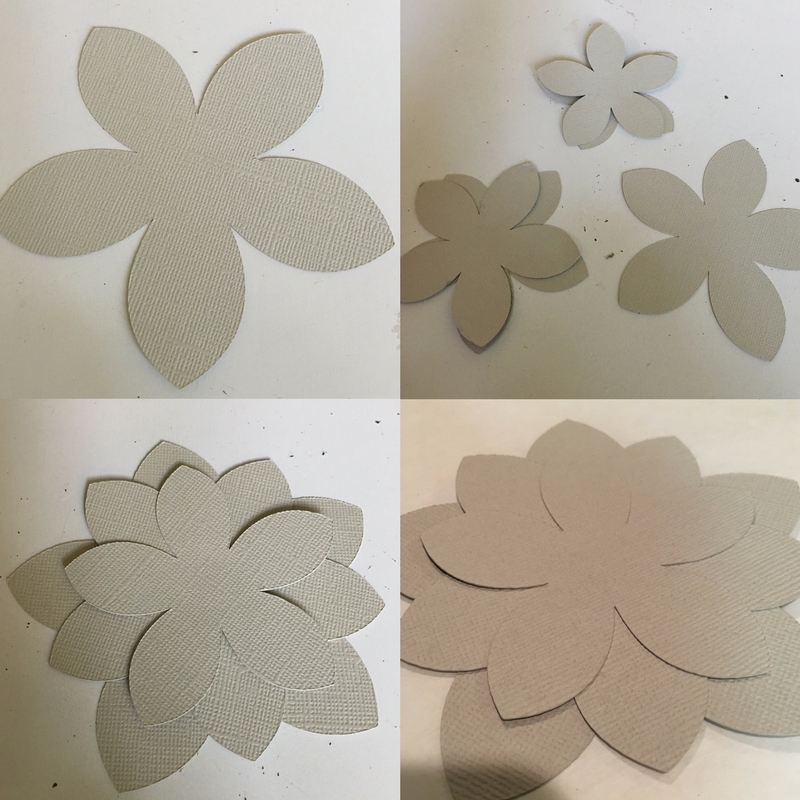
The image is a 5-petal flower image. I could tell by the original West-Elm wreath that this would need to be cut into 3 sizes to accomplish each floral cluster. So I cut samples of this image in sizes 3″, 3.5″ & 4″ (be sure to keep the lock on to maintain the correct proportions for each of the sizes). That size worked for my wreath size so I cut 12 of each size.
It is helpful to manipulate the images right on the Cricut Design Space screen to check the proportions of the petal images.
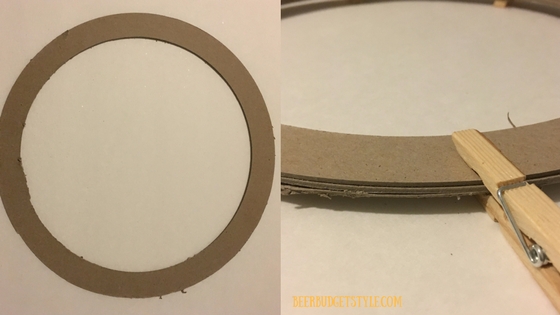
Wreath Form
The wreath form would be cut from chipboard. To create it I used a simple circle shape sized to 11.49″ (so it fits on a standard 12″ mat) and then, I cut (sliced) out another circle approx. 10.5″. Using a deep-cut blade I cut three (3) wreath bases from chipboard. I used white glue to attach them together. BTW: Clothes pins work great to hold them in place until they dry.
Ok, believe it or not, that’s it for the design. Told ya, this is a pretty simple design. Now let’s put it together.
NOTE: If you don’t have a die cutting machine, you can simply cut out the floral images by hand. Just be sure to cut graduating sizes to create the floral cluster. Also, if you are cutting by hand it might be easier to use cardboard for the wreath base.
[raw_html_snippet id="cricut machine"] |
Assembling the clusters
To complete the wreath you will need 12 floral clusters so that means you need 12 of each graduated size floral image. Assemble with the largest size on the bottom, middle a quarter turn and the smallest cutout on top a quarter turn. Using only a dot of white glue, glue pieces together and allow to dry.
Adding Dimension
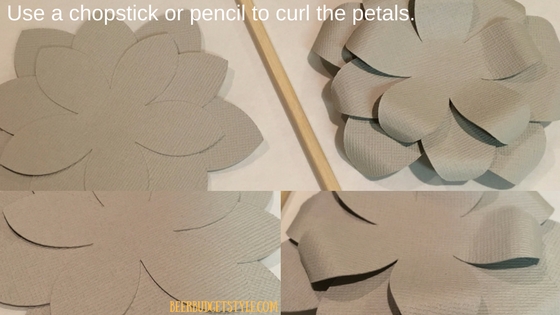
Even though the flat clusters are lovely, well they are just a little too flat. Let’s give them a little dimension, shall we? Use a chopstick or pencil to slightly curl the ends of each petal. Yes, this will take a little time, but I don’t think it took me more than a minute to curl the petals of each cluster. So not too bad and it makes the clusters look way more interesting.
[raw_html_snippet id="cricut air 2 sq - ss"] |
Completing the Wreath
Ok, now lets put it all together and finish our wreath. Using a glue gun, place a cluster at 12 and 6 o’clock. Then place a cluster at 3 and 9 o’clock. Now fill in around the wreath form with the remaining clusters, overlapping the clusters when necessary. You could use white glue here too, but the glue gun makes it go much faster and the clusters don’t move waiting to dry.
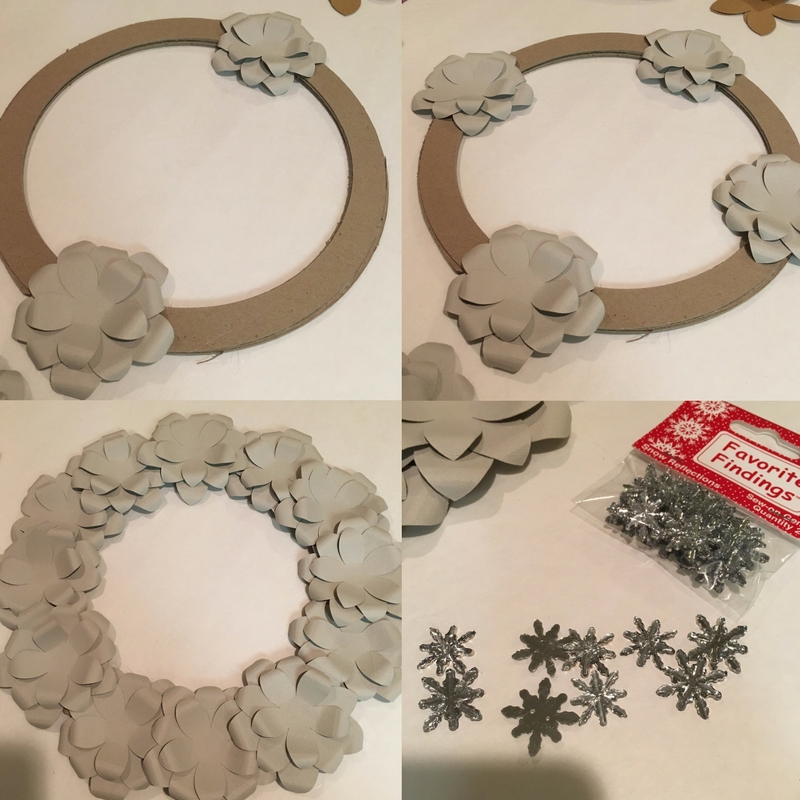
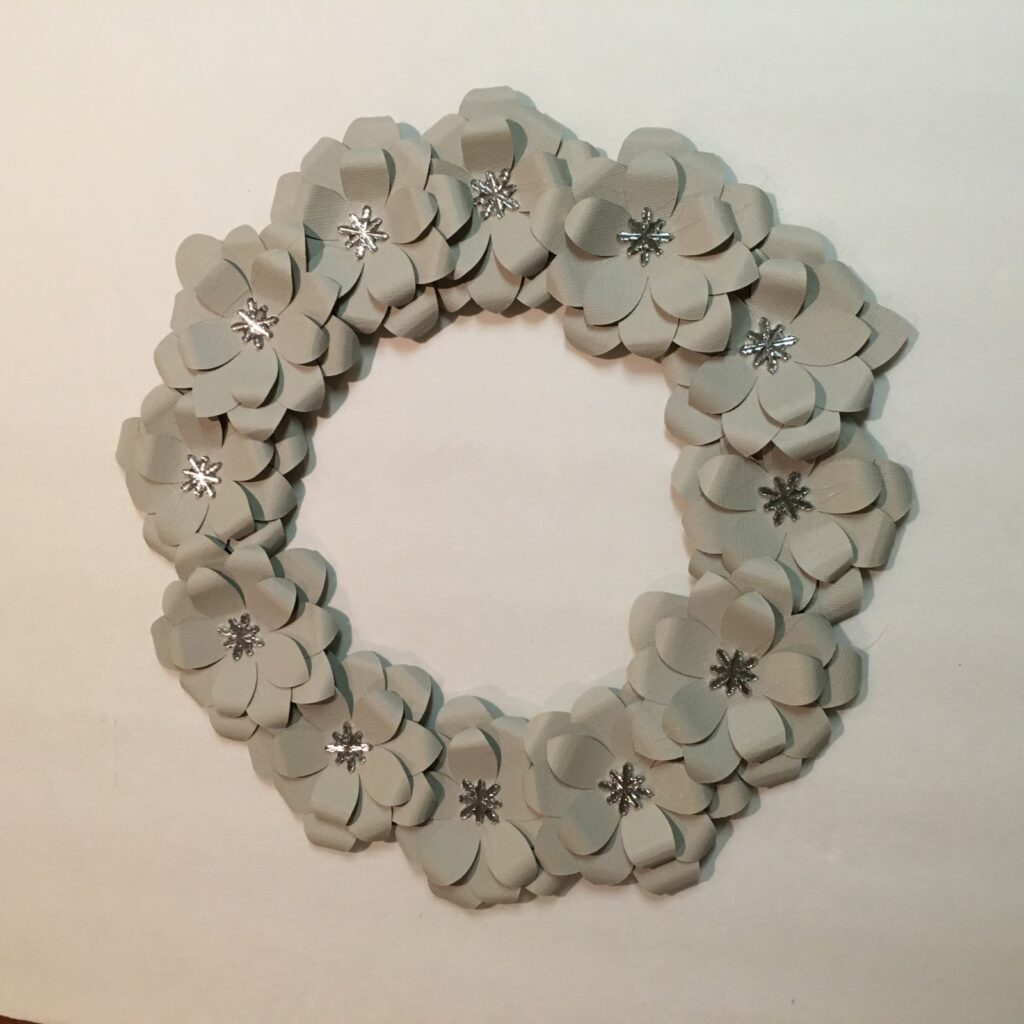
Almost done! Using the glue gun again, apply a metallic button in the center of each cluster. And DONE!
Now wasn’t that super easy?
All that’s needed now is to affix a velcro hanger to the back of the wreath for hanging.
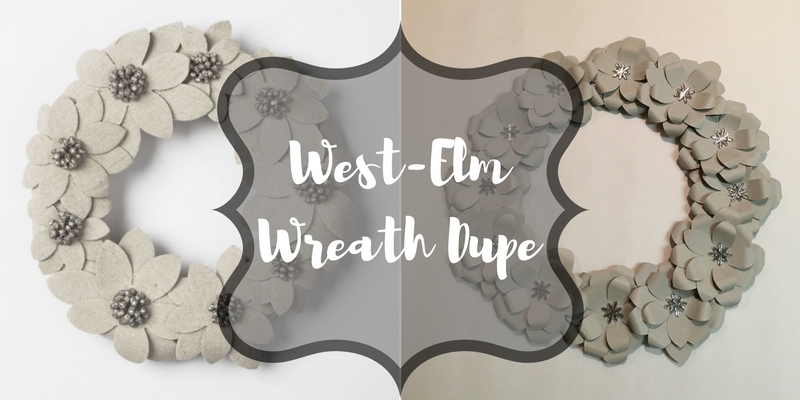
The Finished Wreath
Here’s a side-by-side:
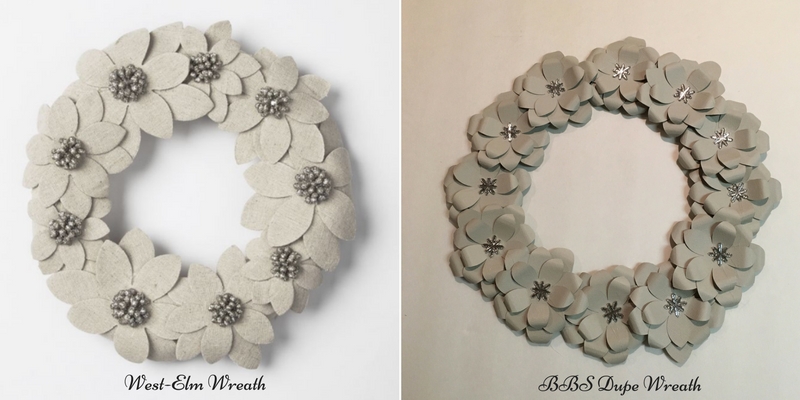
So what do you think? How did I do? No, it’s not an exact match, but I think it’s a pretty good dupe. These are going on our bedroom doors to spread a little Christmas cheer in that part of the house.
Hey, have you made any of your Christmas decorations? I would love to see. Please leave me a comment below and don’t forget to include the pictures.
Keep Decorating:
CHRISTMAS DECORATING IDEAS: Pinecones to Decorate
PRODUCT REVIEW: Bright Tunes String Lights with Speakers